How To Add Site Templates
Our bulk plan customers not only receive additional development site plans, but they also have the option to utilize site templates when creating new sites.
This new feature enables you to create and save personalized templates for effortless deployment with your new site.
Creating a New Template
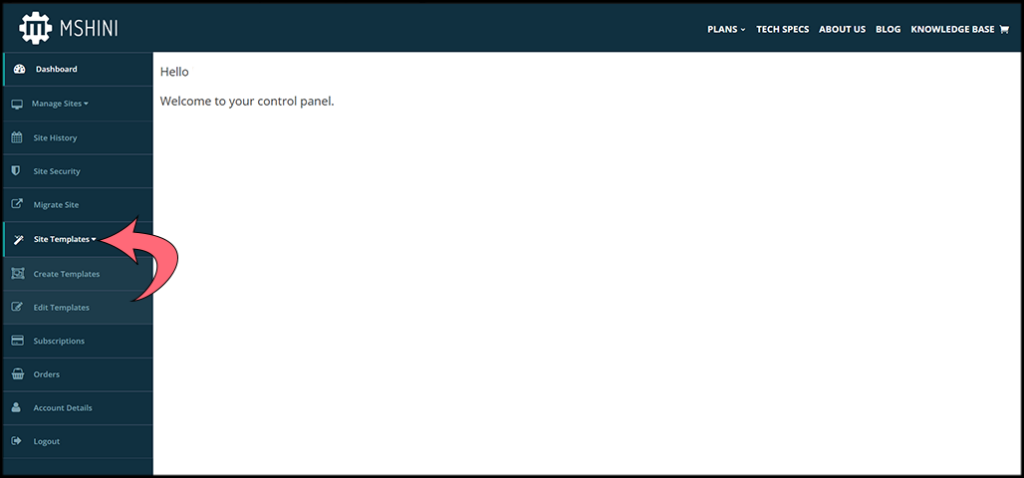
To access the Site Templates tab, simply log in to your hosting account and navigate to your Mshini control panel, where you can click on the Site Templates tab.
You will notice two new tabs, Create and Edit Template, that will allow you to craft and save your favourite themes and plugins for future use.
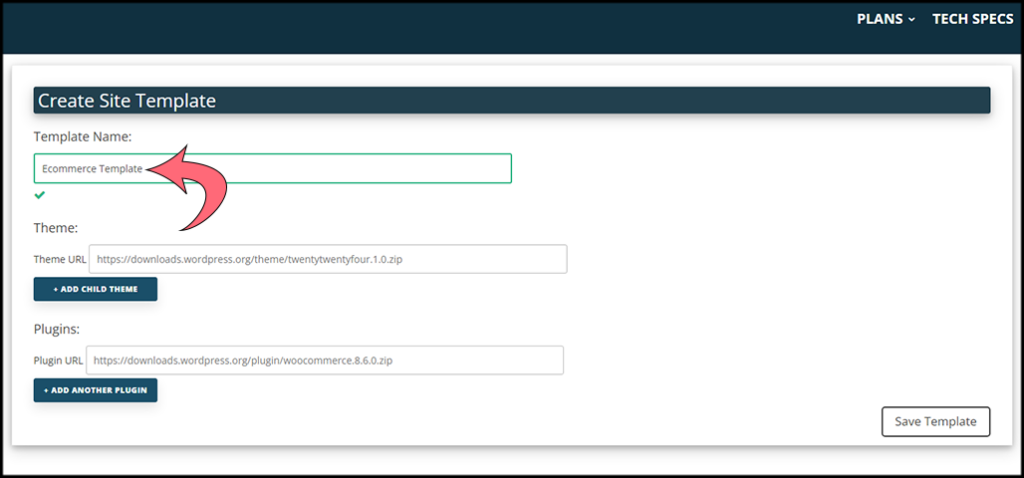
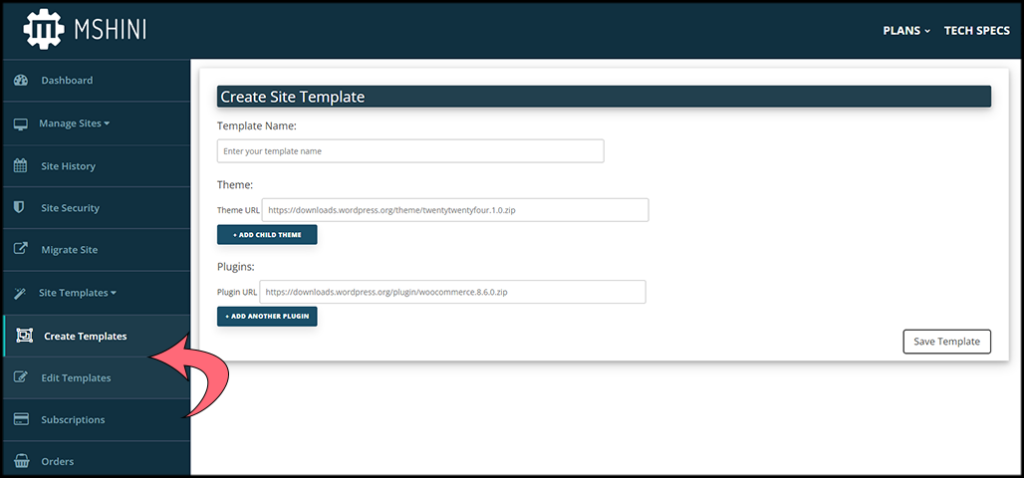
Creating a new template is easy. Just give it a name, find the theme and plugin install file locations, and paste the URLs into your template window. Child themes are also supported.
Adding a Theme
Once you have chosen the theme you want to use and found the URL of the theme install file (where the theme installation zip file is located), you can paste the theme file location path into the Theme URL field.
For this demonstration, we will use the Inspiro By WPZOOM theme from the WordPress Theme repository.
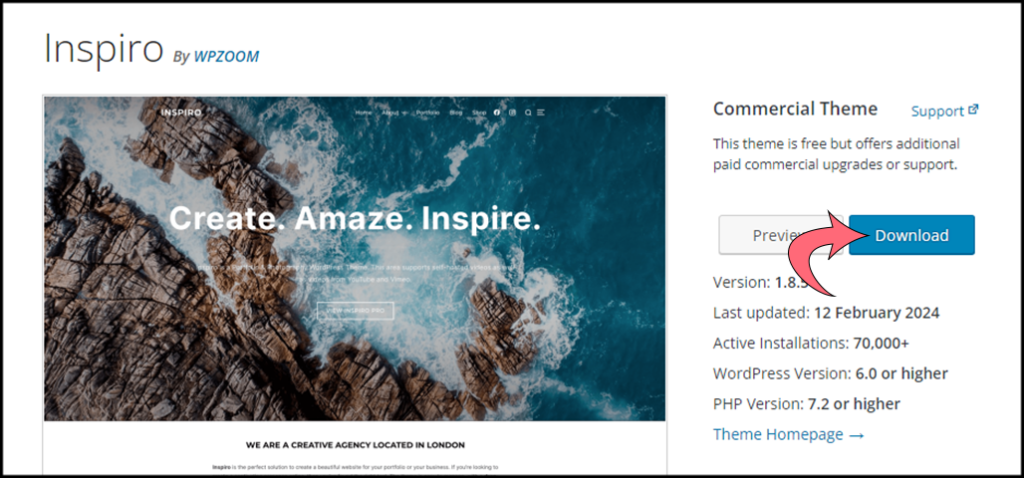
Hovering over the download button will display the location of the installation file for this theme in the bottom left corner of the browser window.
In this example, we can observe the file location as:https://downloads.wordpress.org/theme/inspiro.1.8.5.zip
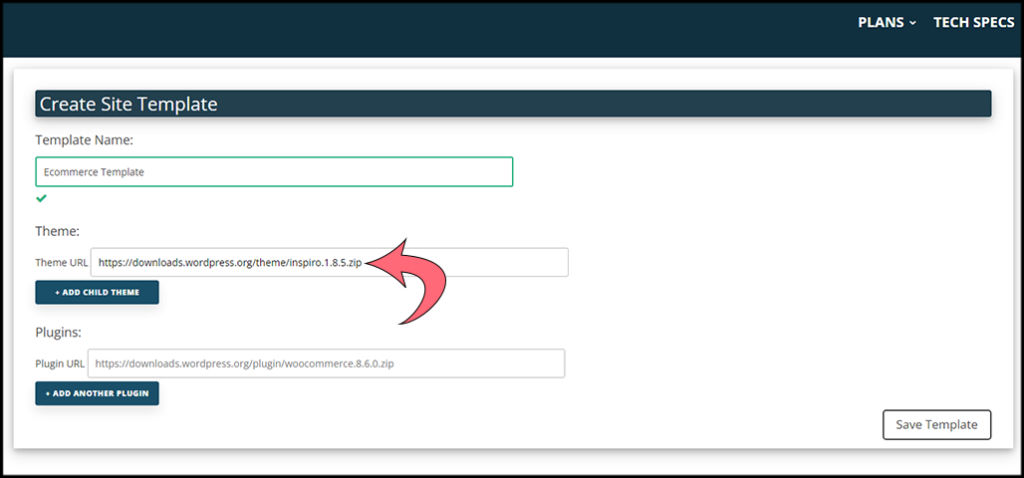
To copy the file location URL, right-click on the download button, choose “Copy Link Address,” and then paste the URL into the Theme URL field of your site template.
Next, we will add some essential plugins.
Adding Plugins
Plugins are added to your template in the same way as the theme. Once you have selected the plugins you want, you will need to add the installation file URL for each plugin to the template’s Plugin URL field.
For our examples, we will use three plugins from the WordPress plugin repository. Let’s begin with the Yoast plugin.
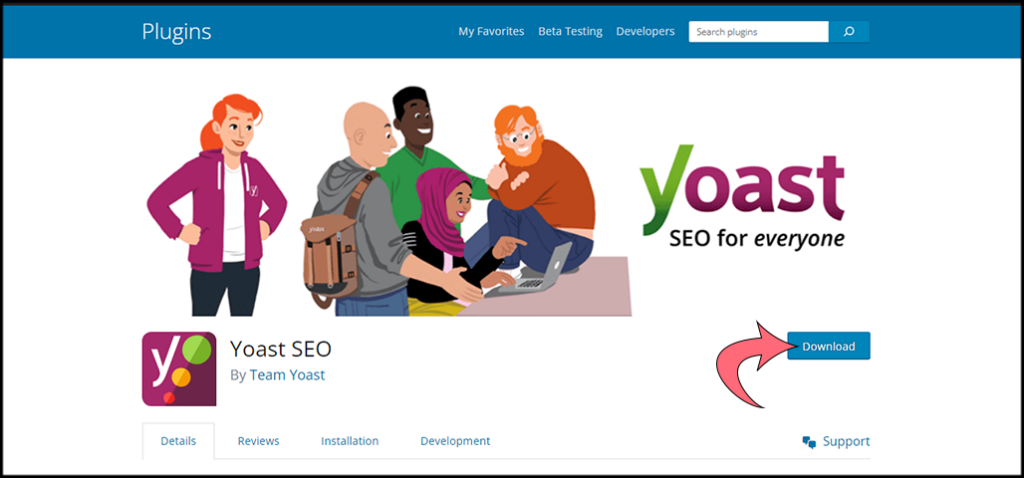
First, we need to locate the Yoast plugin’s installation file URL. Similar to themes, you can find the file path at the bottom left of your browser by hovering over the download button.
We can see that the install file URL for Yoast is as follows: https://downloads.wordpress.org/plugin/wordpress-seo.22.5.zip.
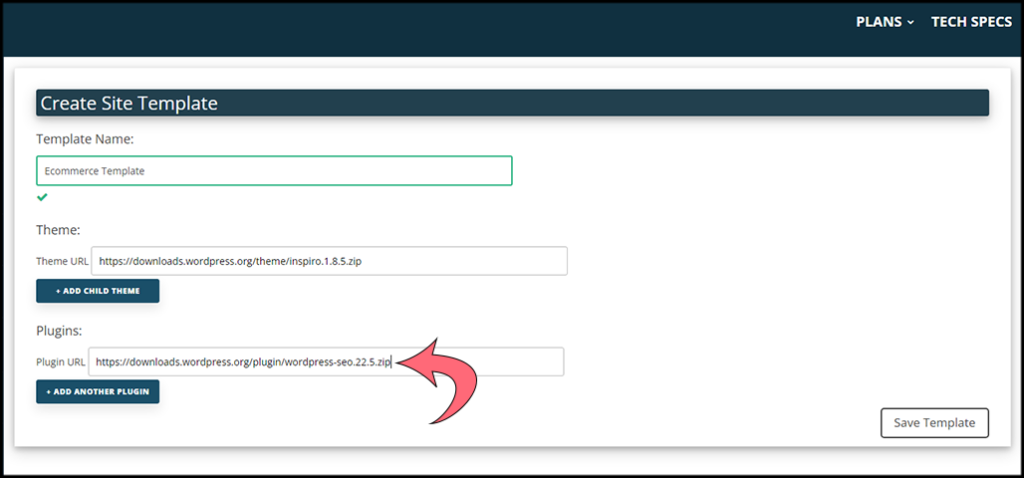
To copy the file location URL, right-click on the download button, choose “Copy Link Address,” and then paste the URL into the Plugin URL field of your site template.
To add more plugins to your template, simply click on the +Add Another Plugin button. This will create a new Plugin URL field in your template. Remember to include the plugin install file URL for each plugin you add.
Feel free to add a few more essential plugins using the process above.
Save Your Template
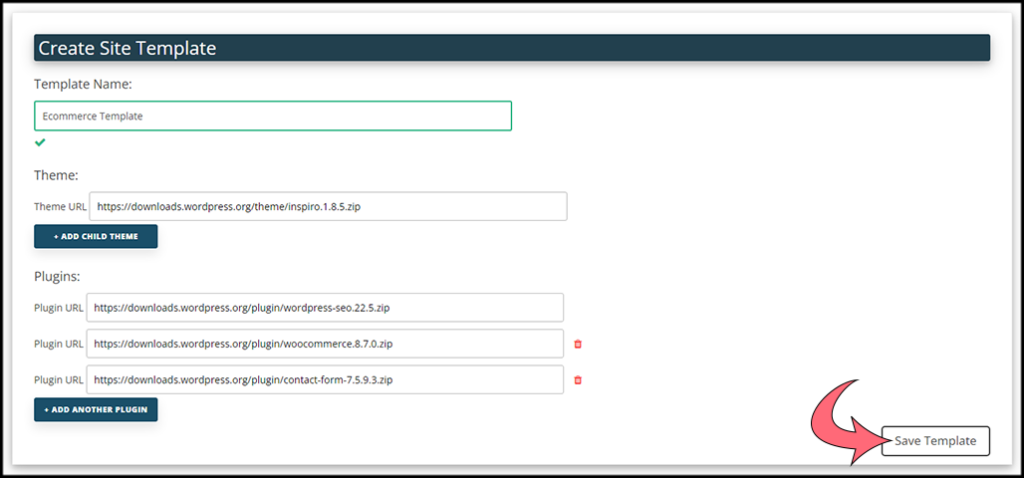
Once you have filled out your template, simply hit the Save Template button and your template will be saved for future use.
Your template has now been created and you can view it simply by clicking on the Edit Template button.
Edit Your Template
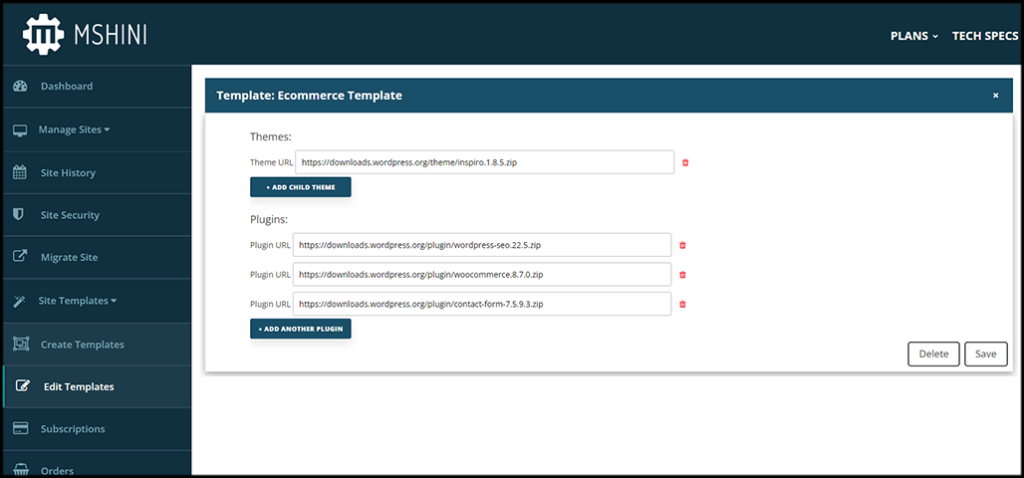
To make changes, click on the remove button to delete the theme or plugin from your template. You can also replace the existing theme URL with a new one.
Additionally, you can remove plugins and add more using the Add Another Plugin button. If you prefer to delete the entire template, you can do so by clicking on the Delete button, which will erase the saved template from your profile.
Once you are happy with your theme and plugin choice, remember to save your site template by clicking on the Save button. You are now ready to deploy your personalized site template with your next site.
If you need any help with deploying your new template, please refer to our deployment guide here.


