How do I create a Staging Environment?
With Mshini’s in-house control panel, we have made it easy for you to use our staging environment at the click of a button. All you need to do is log into your Mshini account dashboard.
In the dashboard menu, click on the ‘Manage Sites‘ tab which will open your site management tools. You will see a list of available options to help you manage your site.
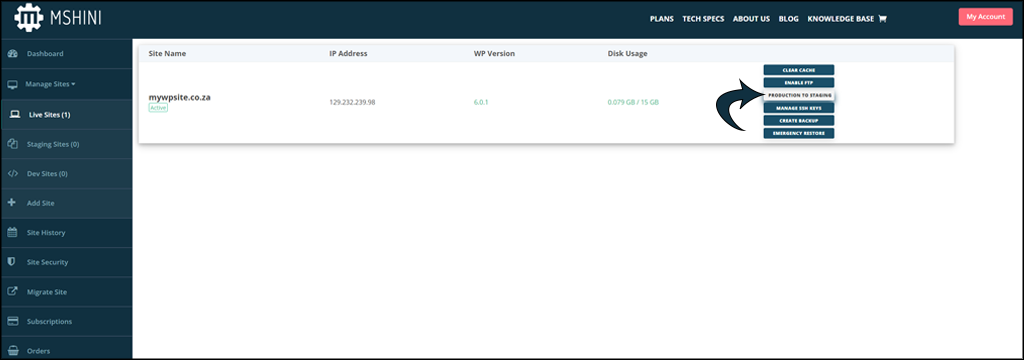
By pressing the Production to Staging button, you can create a staging environment where you can safely test and work on your website. It is that simple! Go ahead, try it. You will be taken to the site history tab after clicking on Production to Staging.
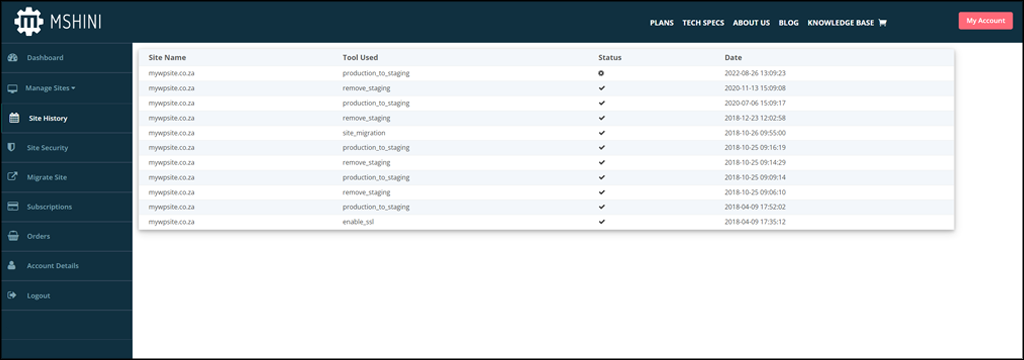
You can check on the progress in your history tab. You will see a spinning wheel that automatically refreshes up until your staging environment has been successfully created. The staging environment you just created will be visible and right at the top of your history. It’s a good rule of thumb, depending on how large your website is to wait up to 5 minutes for the process to complete.
Getting started on your staging site is as simple as logging into your WordPress dashboard, or just entering your domain name into your browser, the only difference being, that your URL will now have ‘staging.’ in front of your domain name.
To view your staging environment, you can add ‘staging.’ to the beginning of your domain name, as seen in the example below:
staging.yourdomain.co.za
To access your WordPress dashboard, you can enter the following into your browser’s address bar:
staging.yourdomain.co.za/wp-login.php
Browsing to the above URL will take you directly to your staging site’s login page, where you can enter your username and password to access your WordPress dashboard and begin with all your testing or development changes you would like to implement. Once you are comfortable with your changes in staging, it is time to push your staging environment back onto production.
Please do note that it is of vital importance to make sure that all your changes have been extensively tested and that your website is functioning as it should before you push from staging onto production. When doing this, all your live production content will be replaced with the content from the staging environment!
Getting your staging environment back onto production works the same way as creating a staging site, but only in reverse. Once all the tweaks are done, and you have made sure everything is working 100%, you push your staging environment onto your production site. This is easily done by accessing your Mshini control panel, navigating back to Manage Sites, and then selecting the Staging Sites tab at the top of the screen.
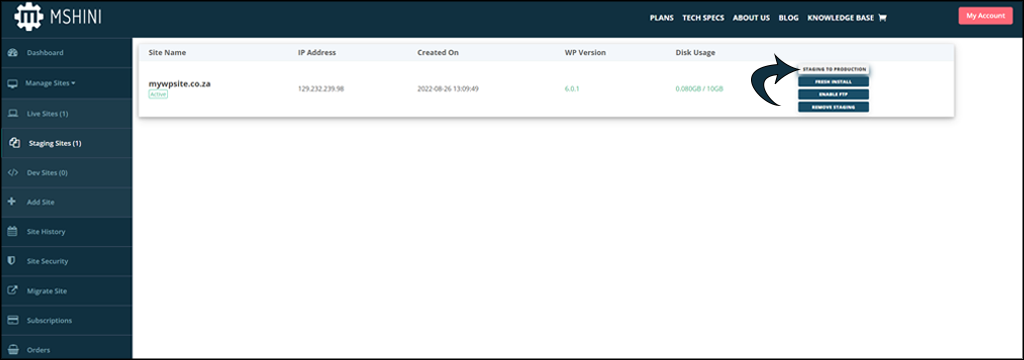
After you have clicked the ‘Staging to Production‘ button, it will again take you to your Sites History tab, where you will see a spinning wheel up until the staging environment has been successfully pushed onto the production site. Again, depending on how large your website is, a good rule of thumb is to wait up to 5 minutes for the process to complete.
Now would be a good time to clear your local browser cache, as it might still be storing your old website cache.
And that is it. You have just created a virtual clone of your production site to do all your experimenting with, safely hidden from any visitors that might have been browsing your site at the same time. Working in a staging environment is a great way to test ideas you want to implement before presenting them to the world.


